
Vintage Dyed Pages of Possibility

Confession: I’m obsessed with vintage paper.
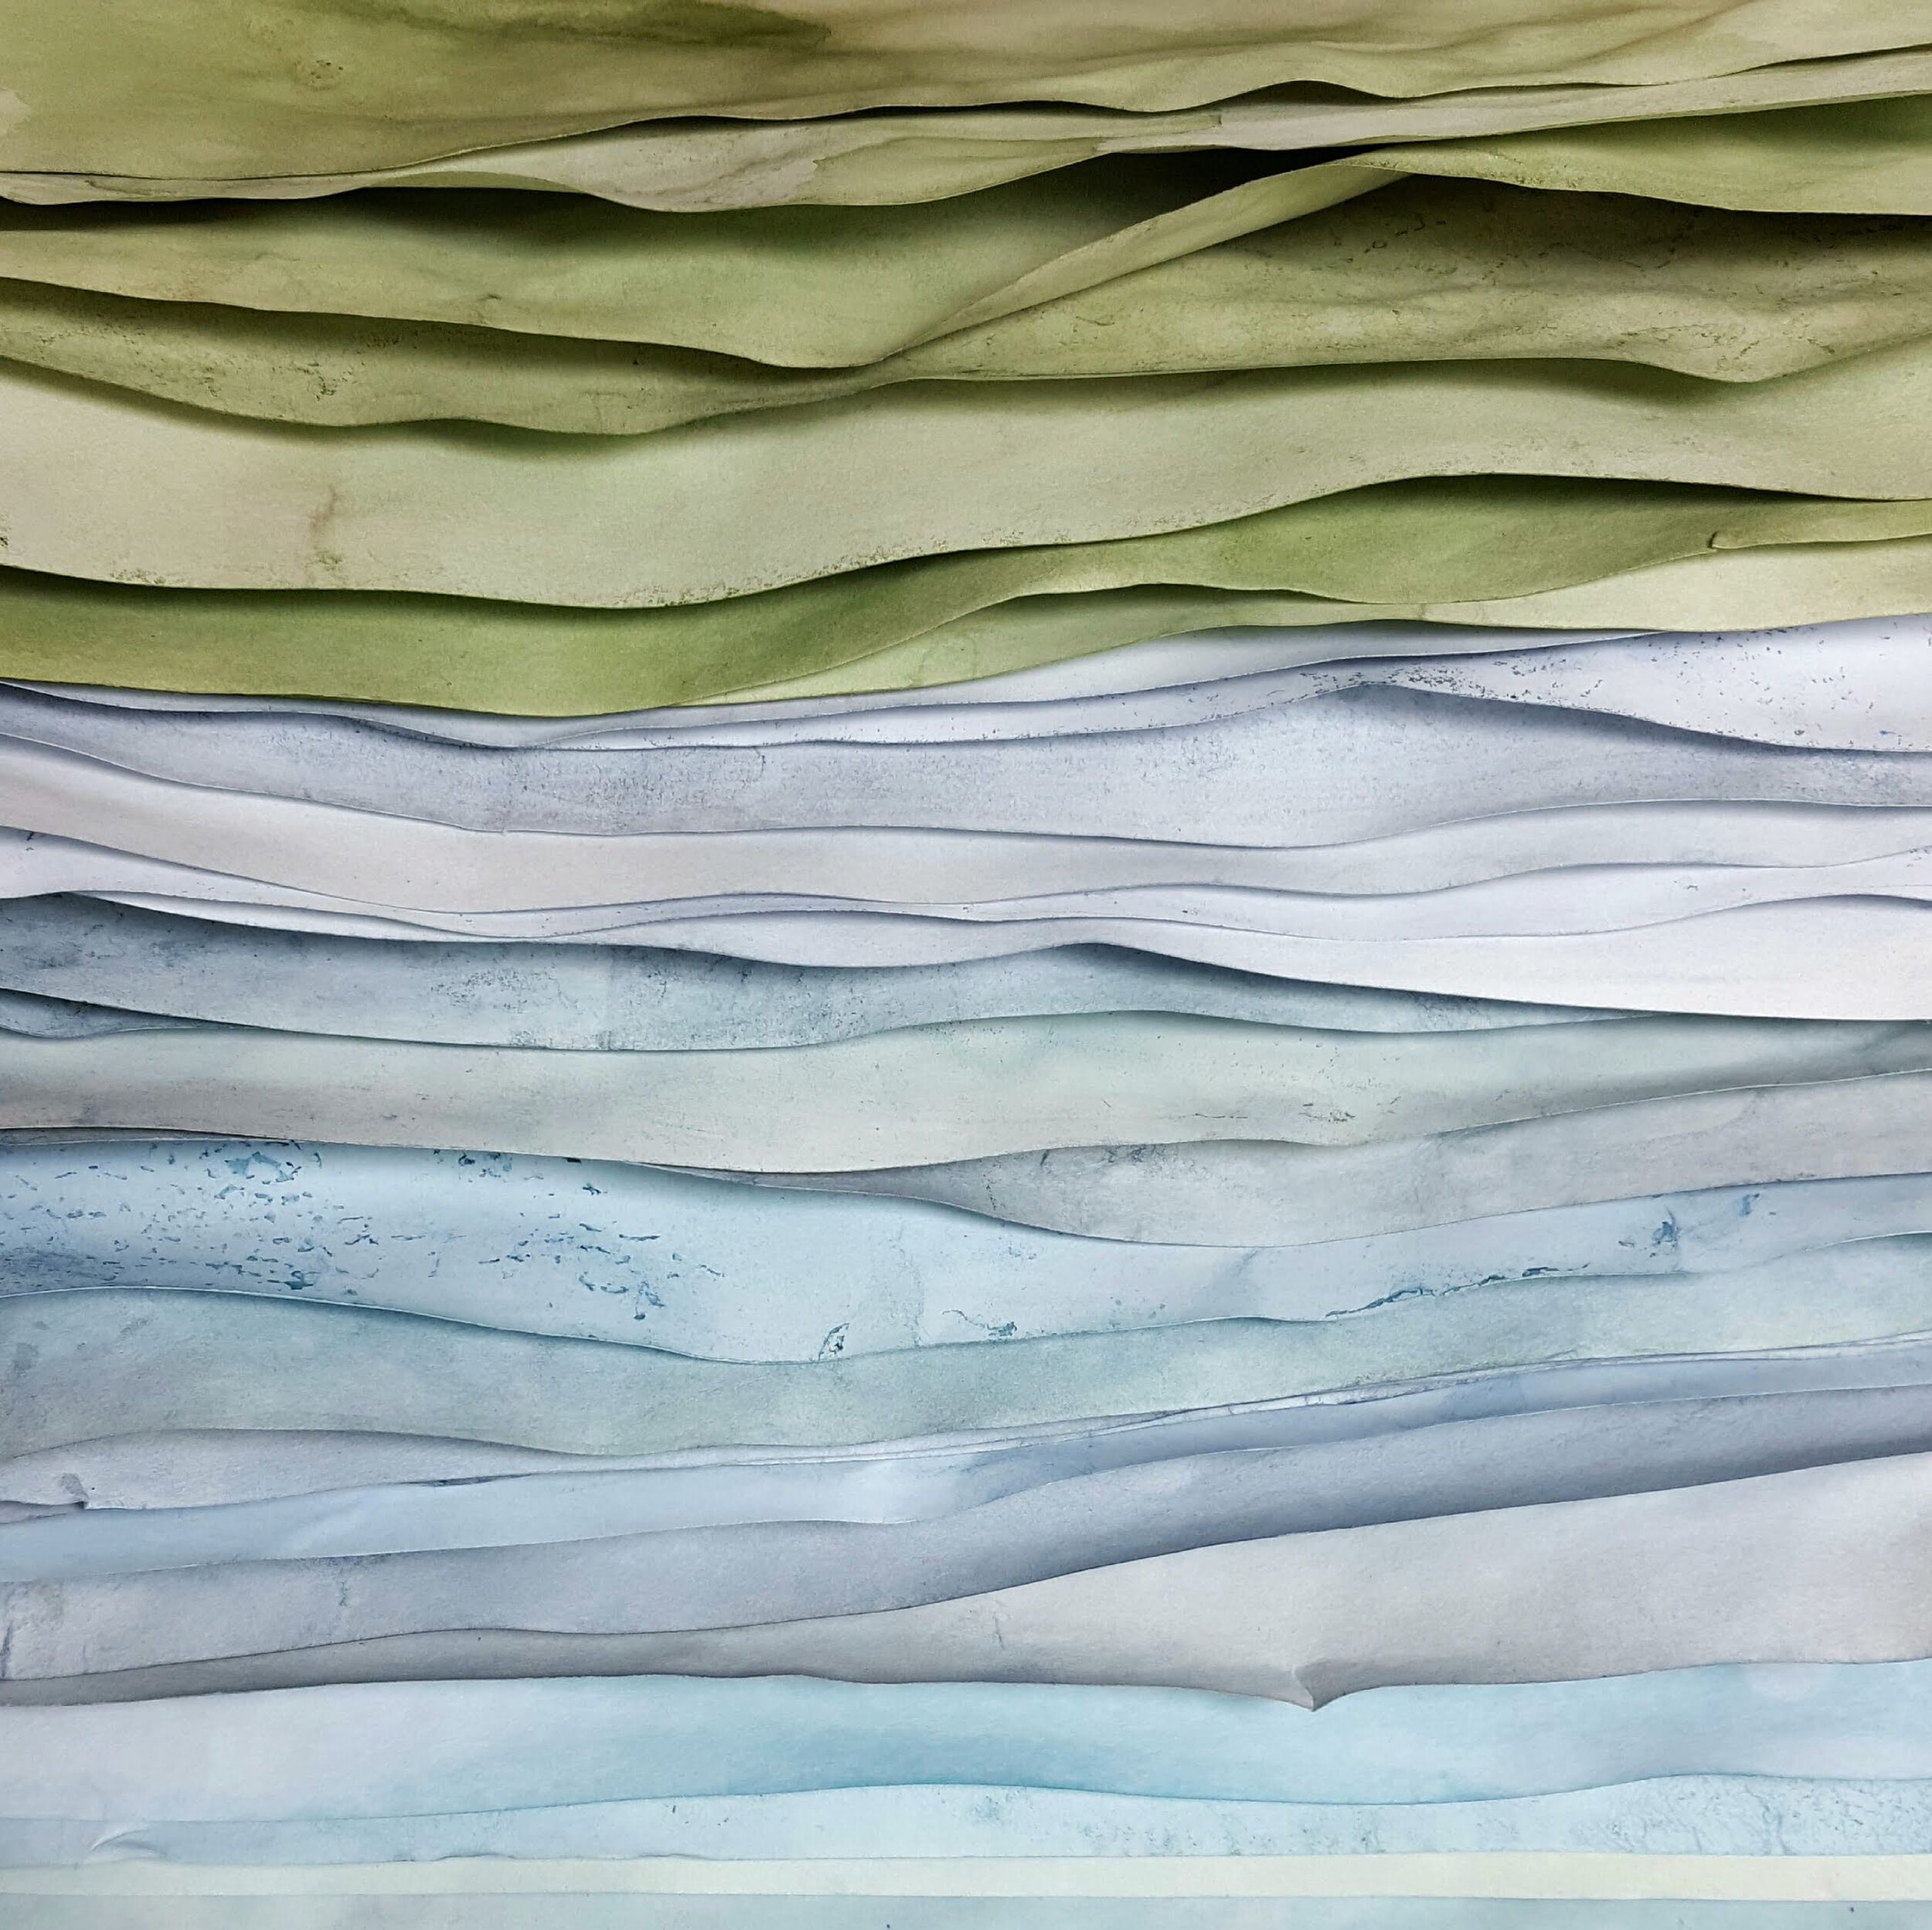
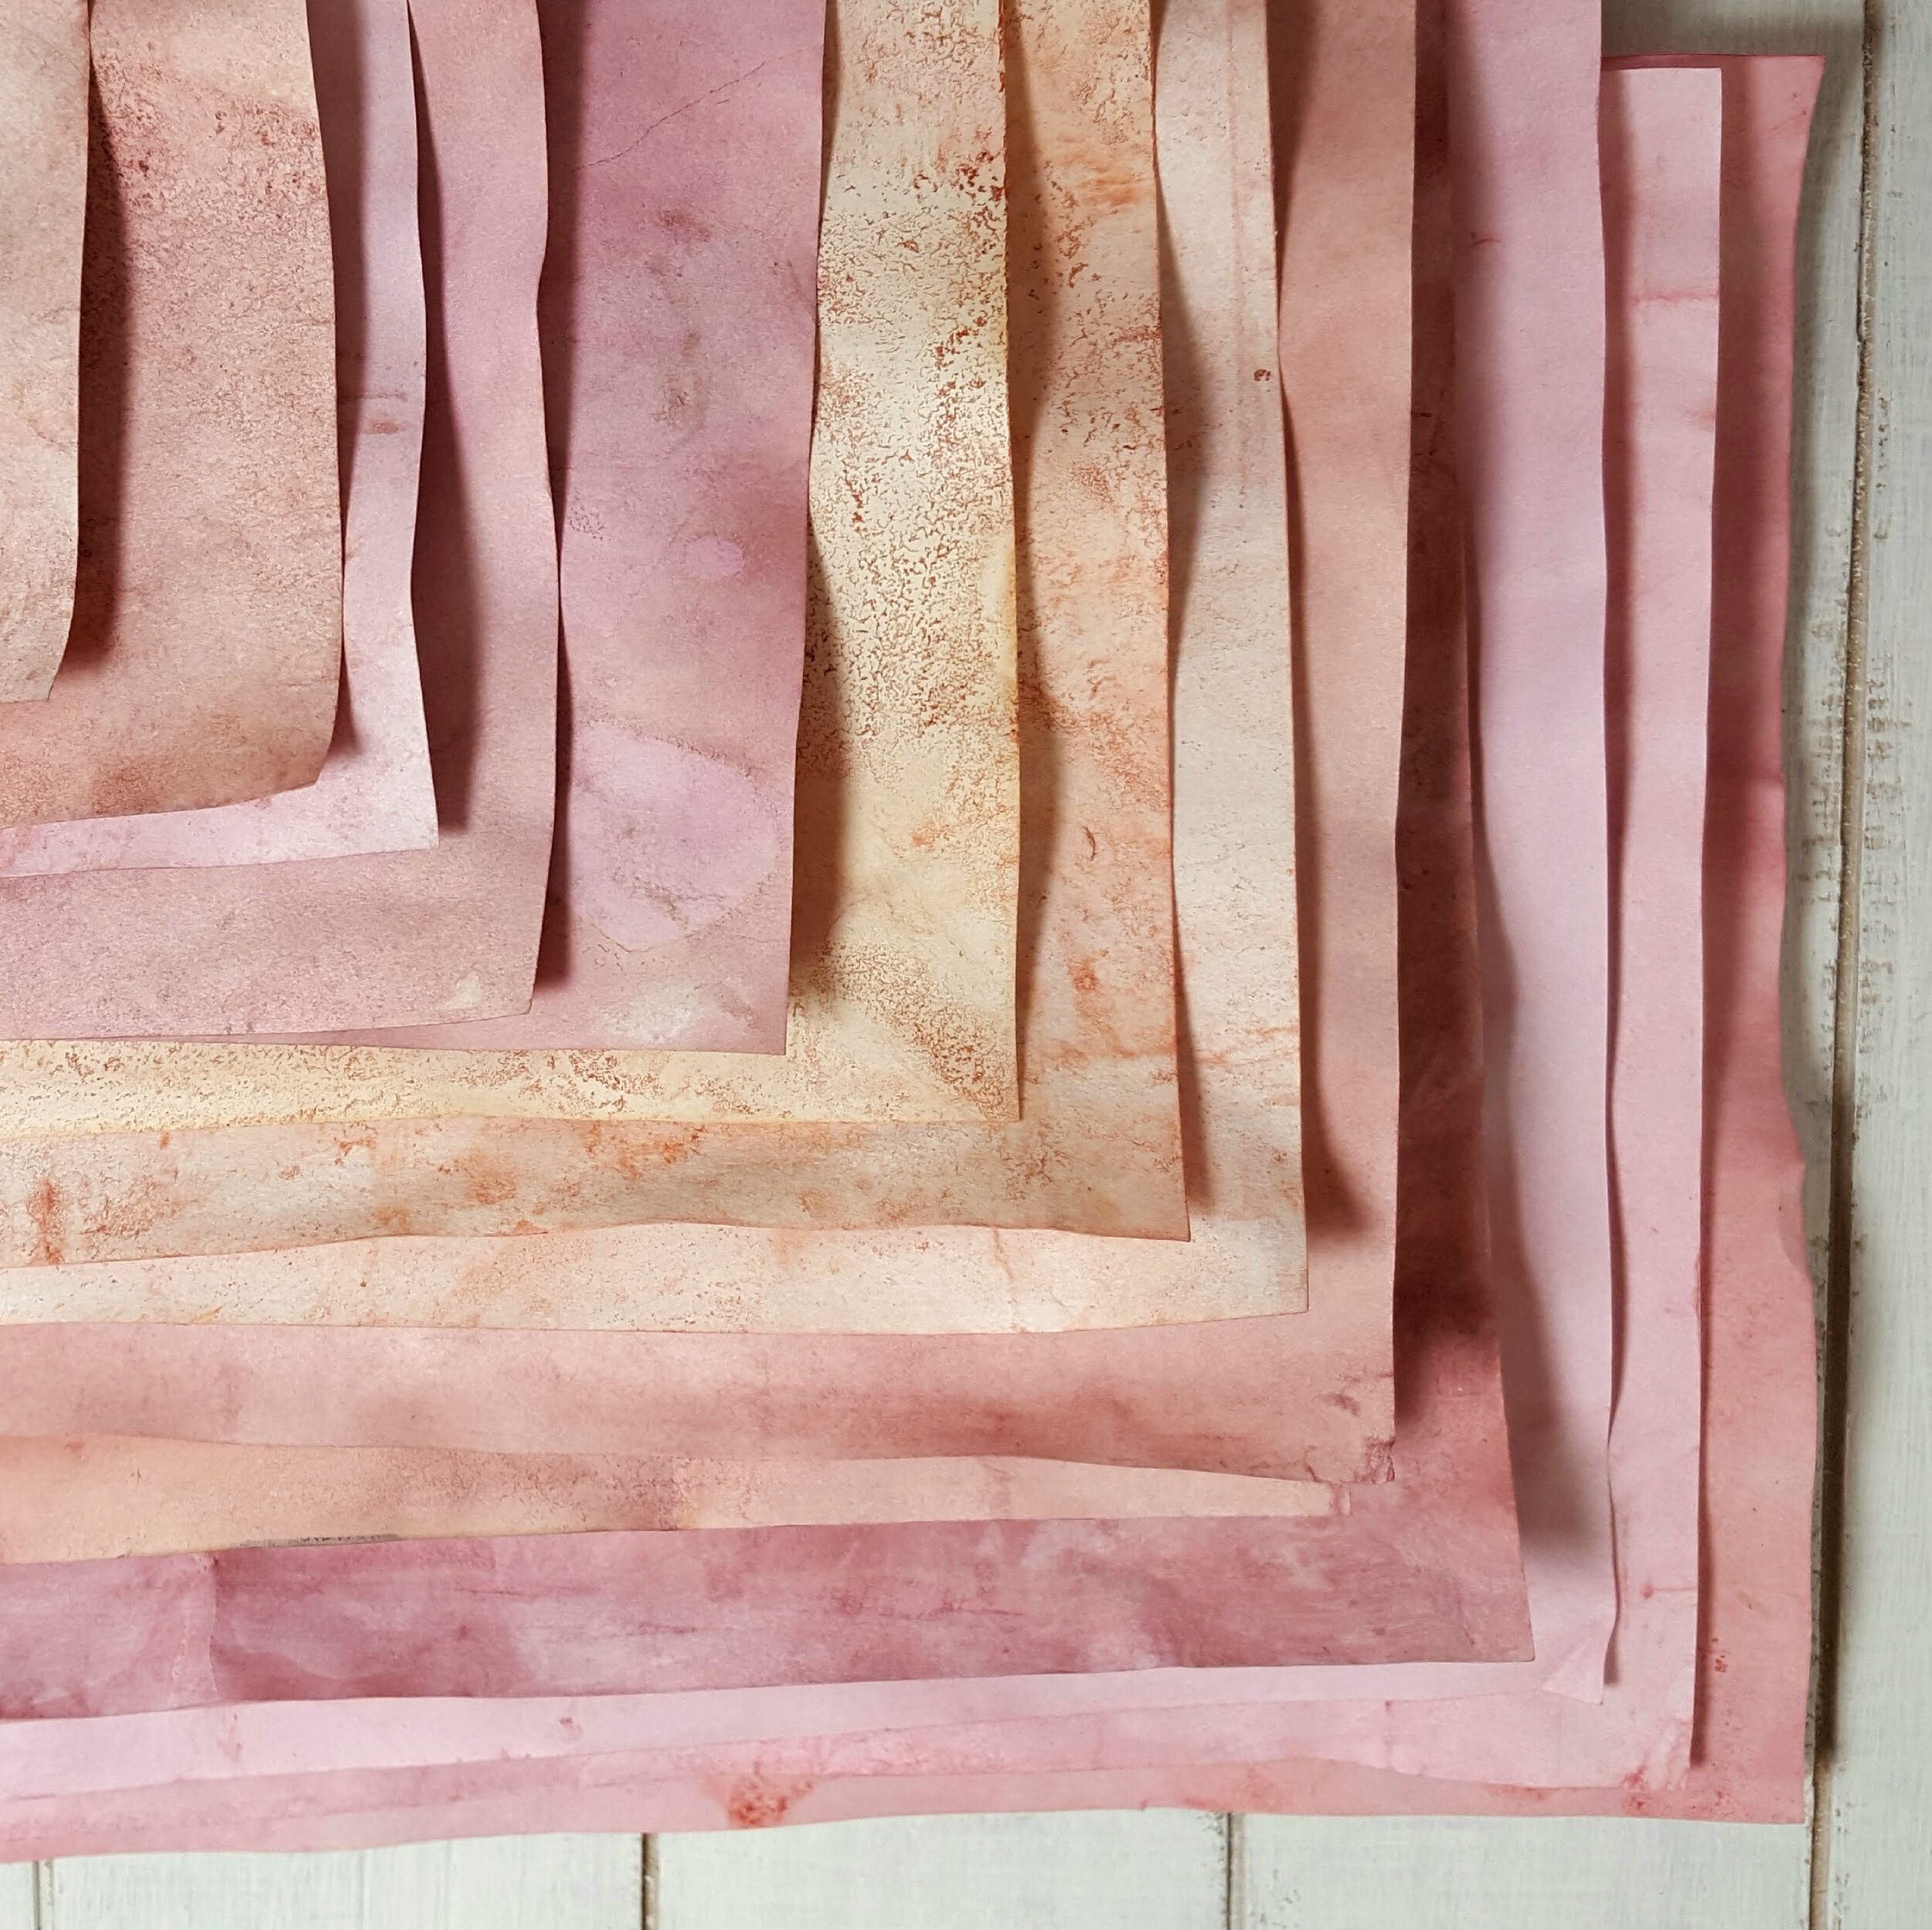
Not just any vintage paper. The stuff I love the most is faded and crinkly. It’s sturdy but a little rough around the edges. The colors are soft and muted. It reminds me of far away places I’ve traveled through. It begs to be layered and torn and bound into books.
Now you’ve probably seen how popular it is (again) to dye paper and old book pages with tea and coffee to get that warm golden vintage color. You may have even tried using avacado pits to get a nice rosy pink or black beans to get blue and purple shades. Me too! Who knew black beans could be so fun, right?
OK, maybe not that fun. I love the colors I can achieve with avacado and a little vinegar or baking soda but the black beans didn’t really give me the blues I really wanted. What I really want are soft greens, golden yellows, and the perfect periwinkle blue. On top of that, it took a long time to soak and simmer those avacado pits and I’m not very patient.
So what did I do? I cleaned my studio! Yep. It’s just how I think through things best.
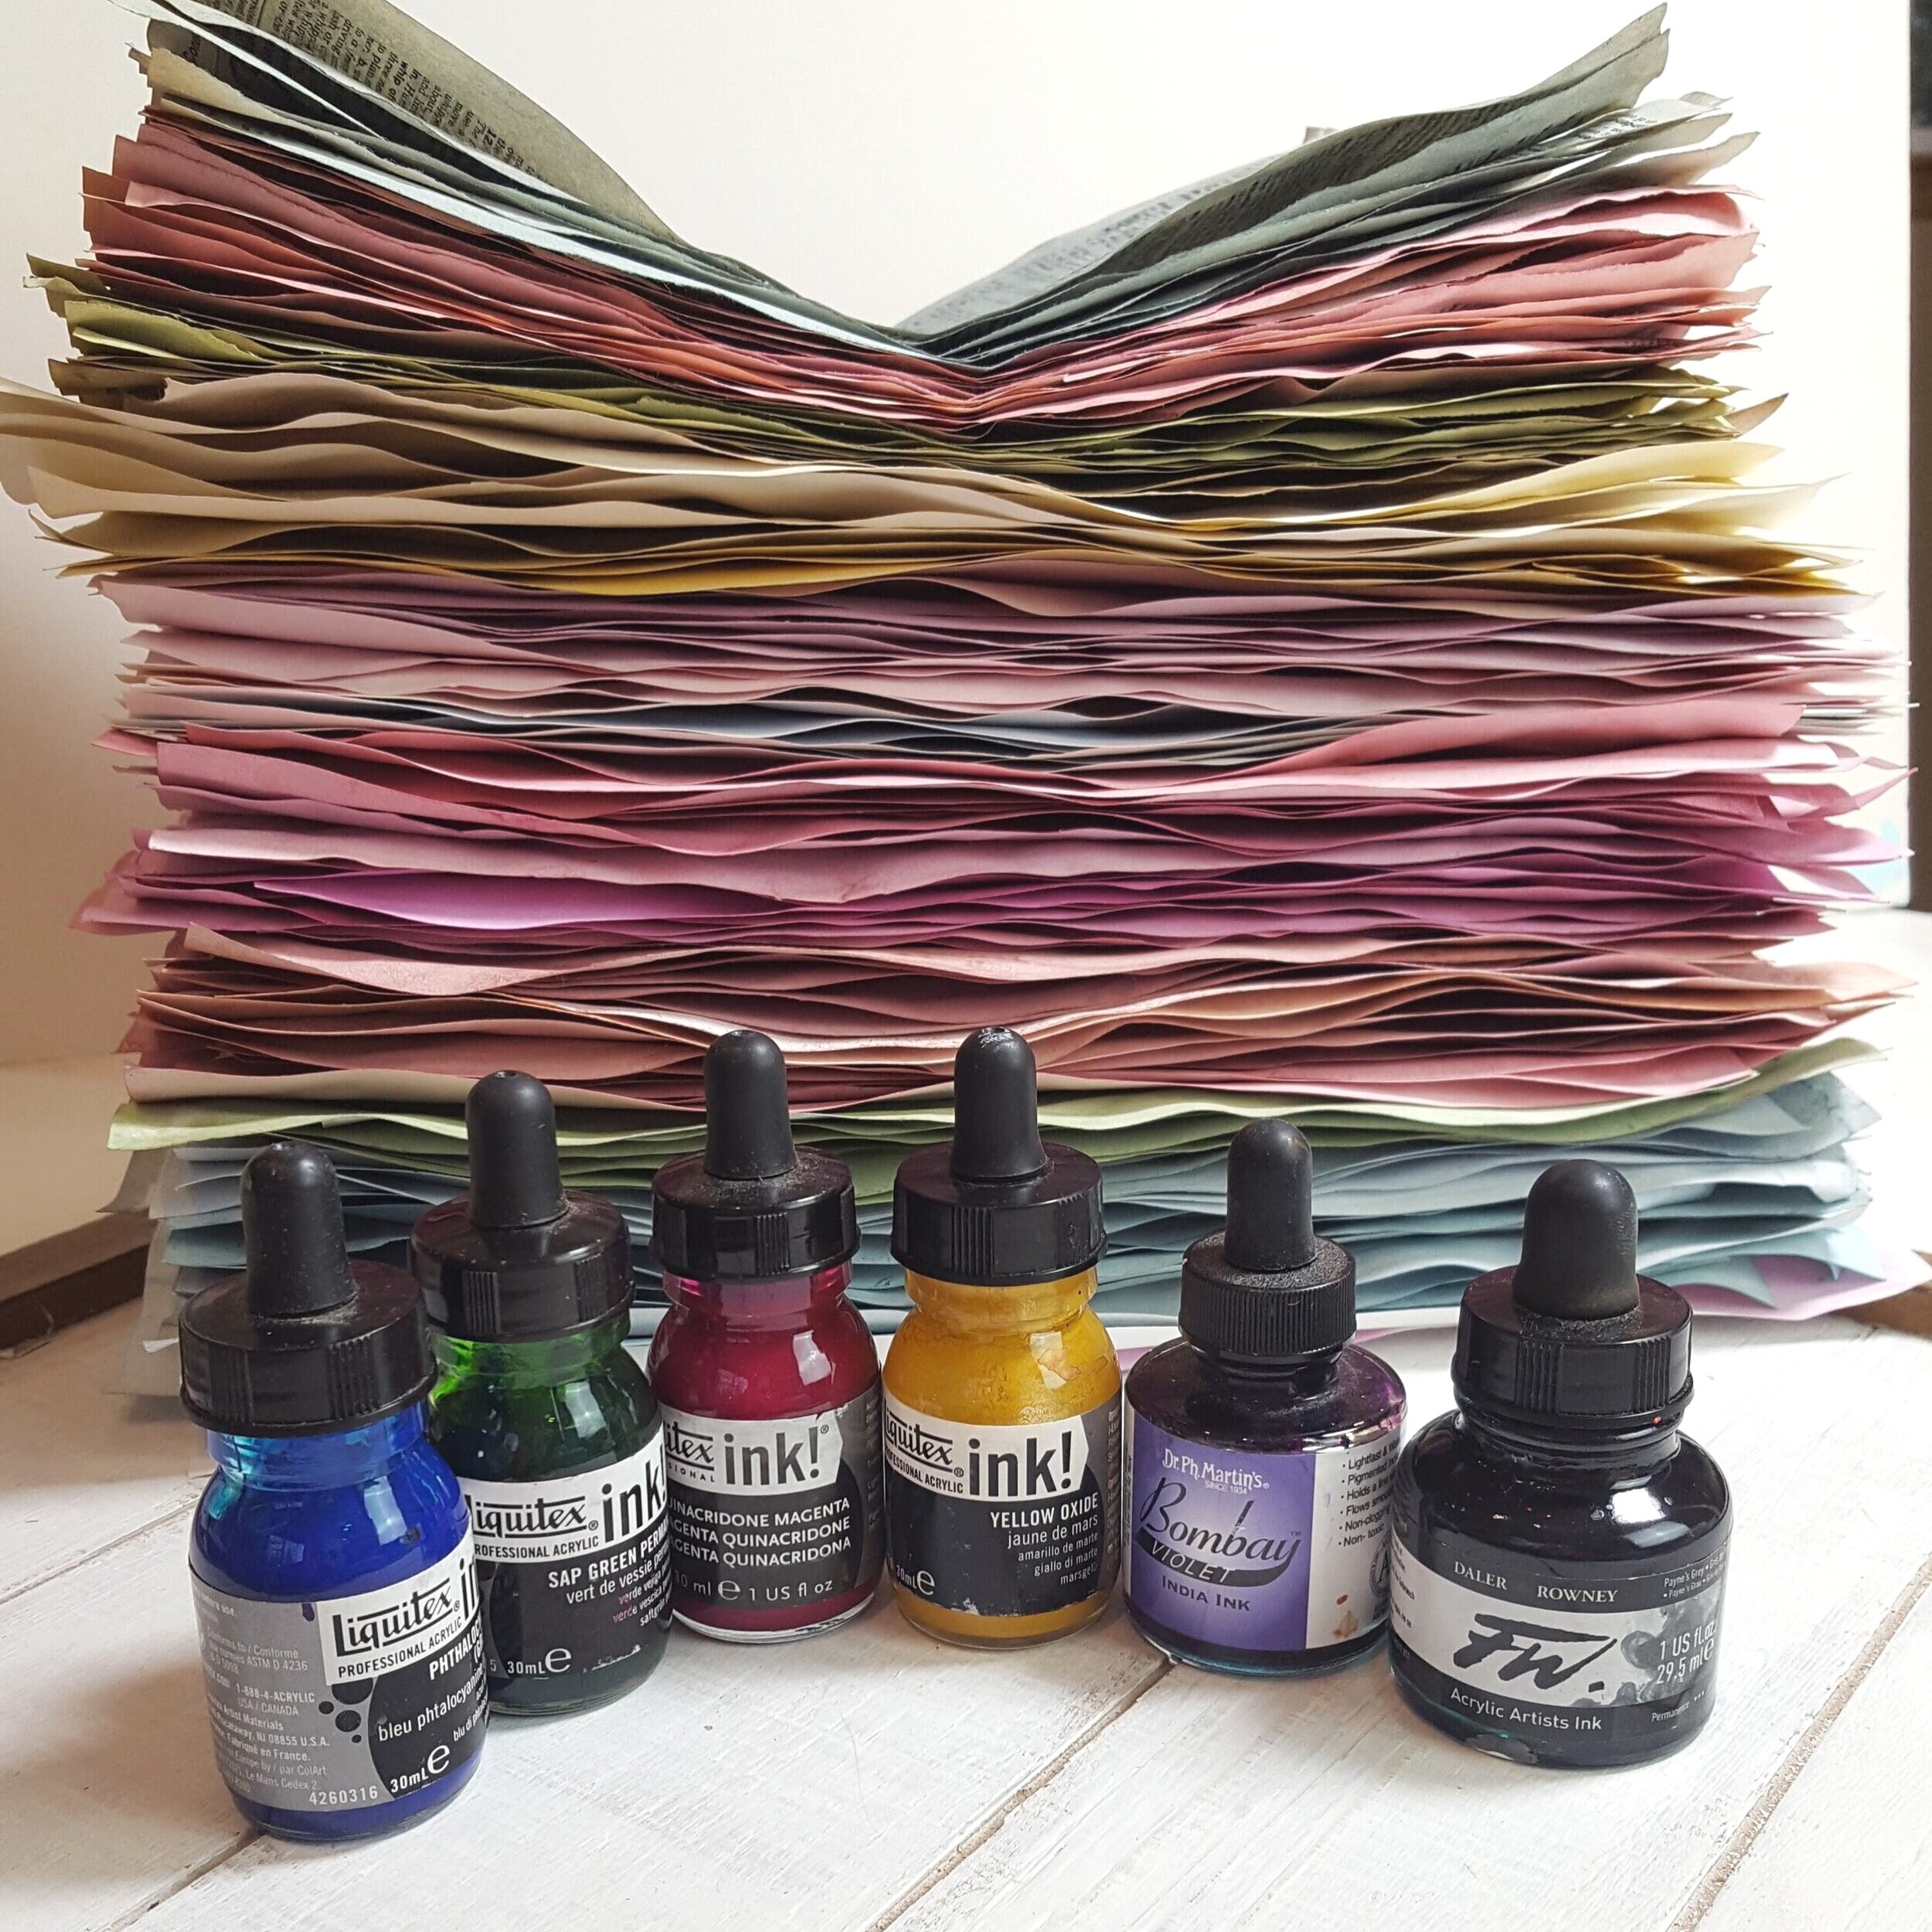
In tidying up and putting things away, I noticed that I had a lot of things sitting out that I’m not currently using. One of those things, a rather large one, is my collection of acrylic ink. I do paint with them and use them in mixed media pieces but it occurred to me that they might end up drying up before I get around to playing with them again. And that’s the moment it hit me! I could dye my papers with ink!!!
Acrylic ink is wonderful because it’s very concentrated, dries permanent, and can be thinned with water. The inks come in lots of vibrant colors and they mix easily. I knew I wanted my colors to be soft and faded. Nothing too bright or bold. I was after a vintage, sun-faded afternoon British tea sort of look.
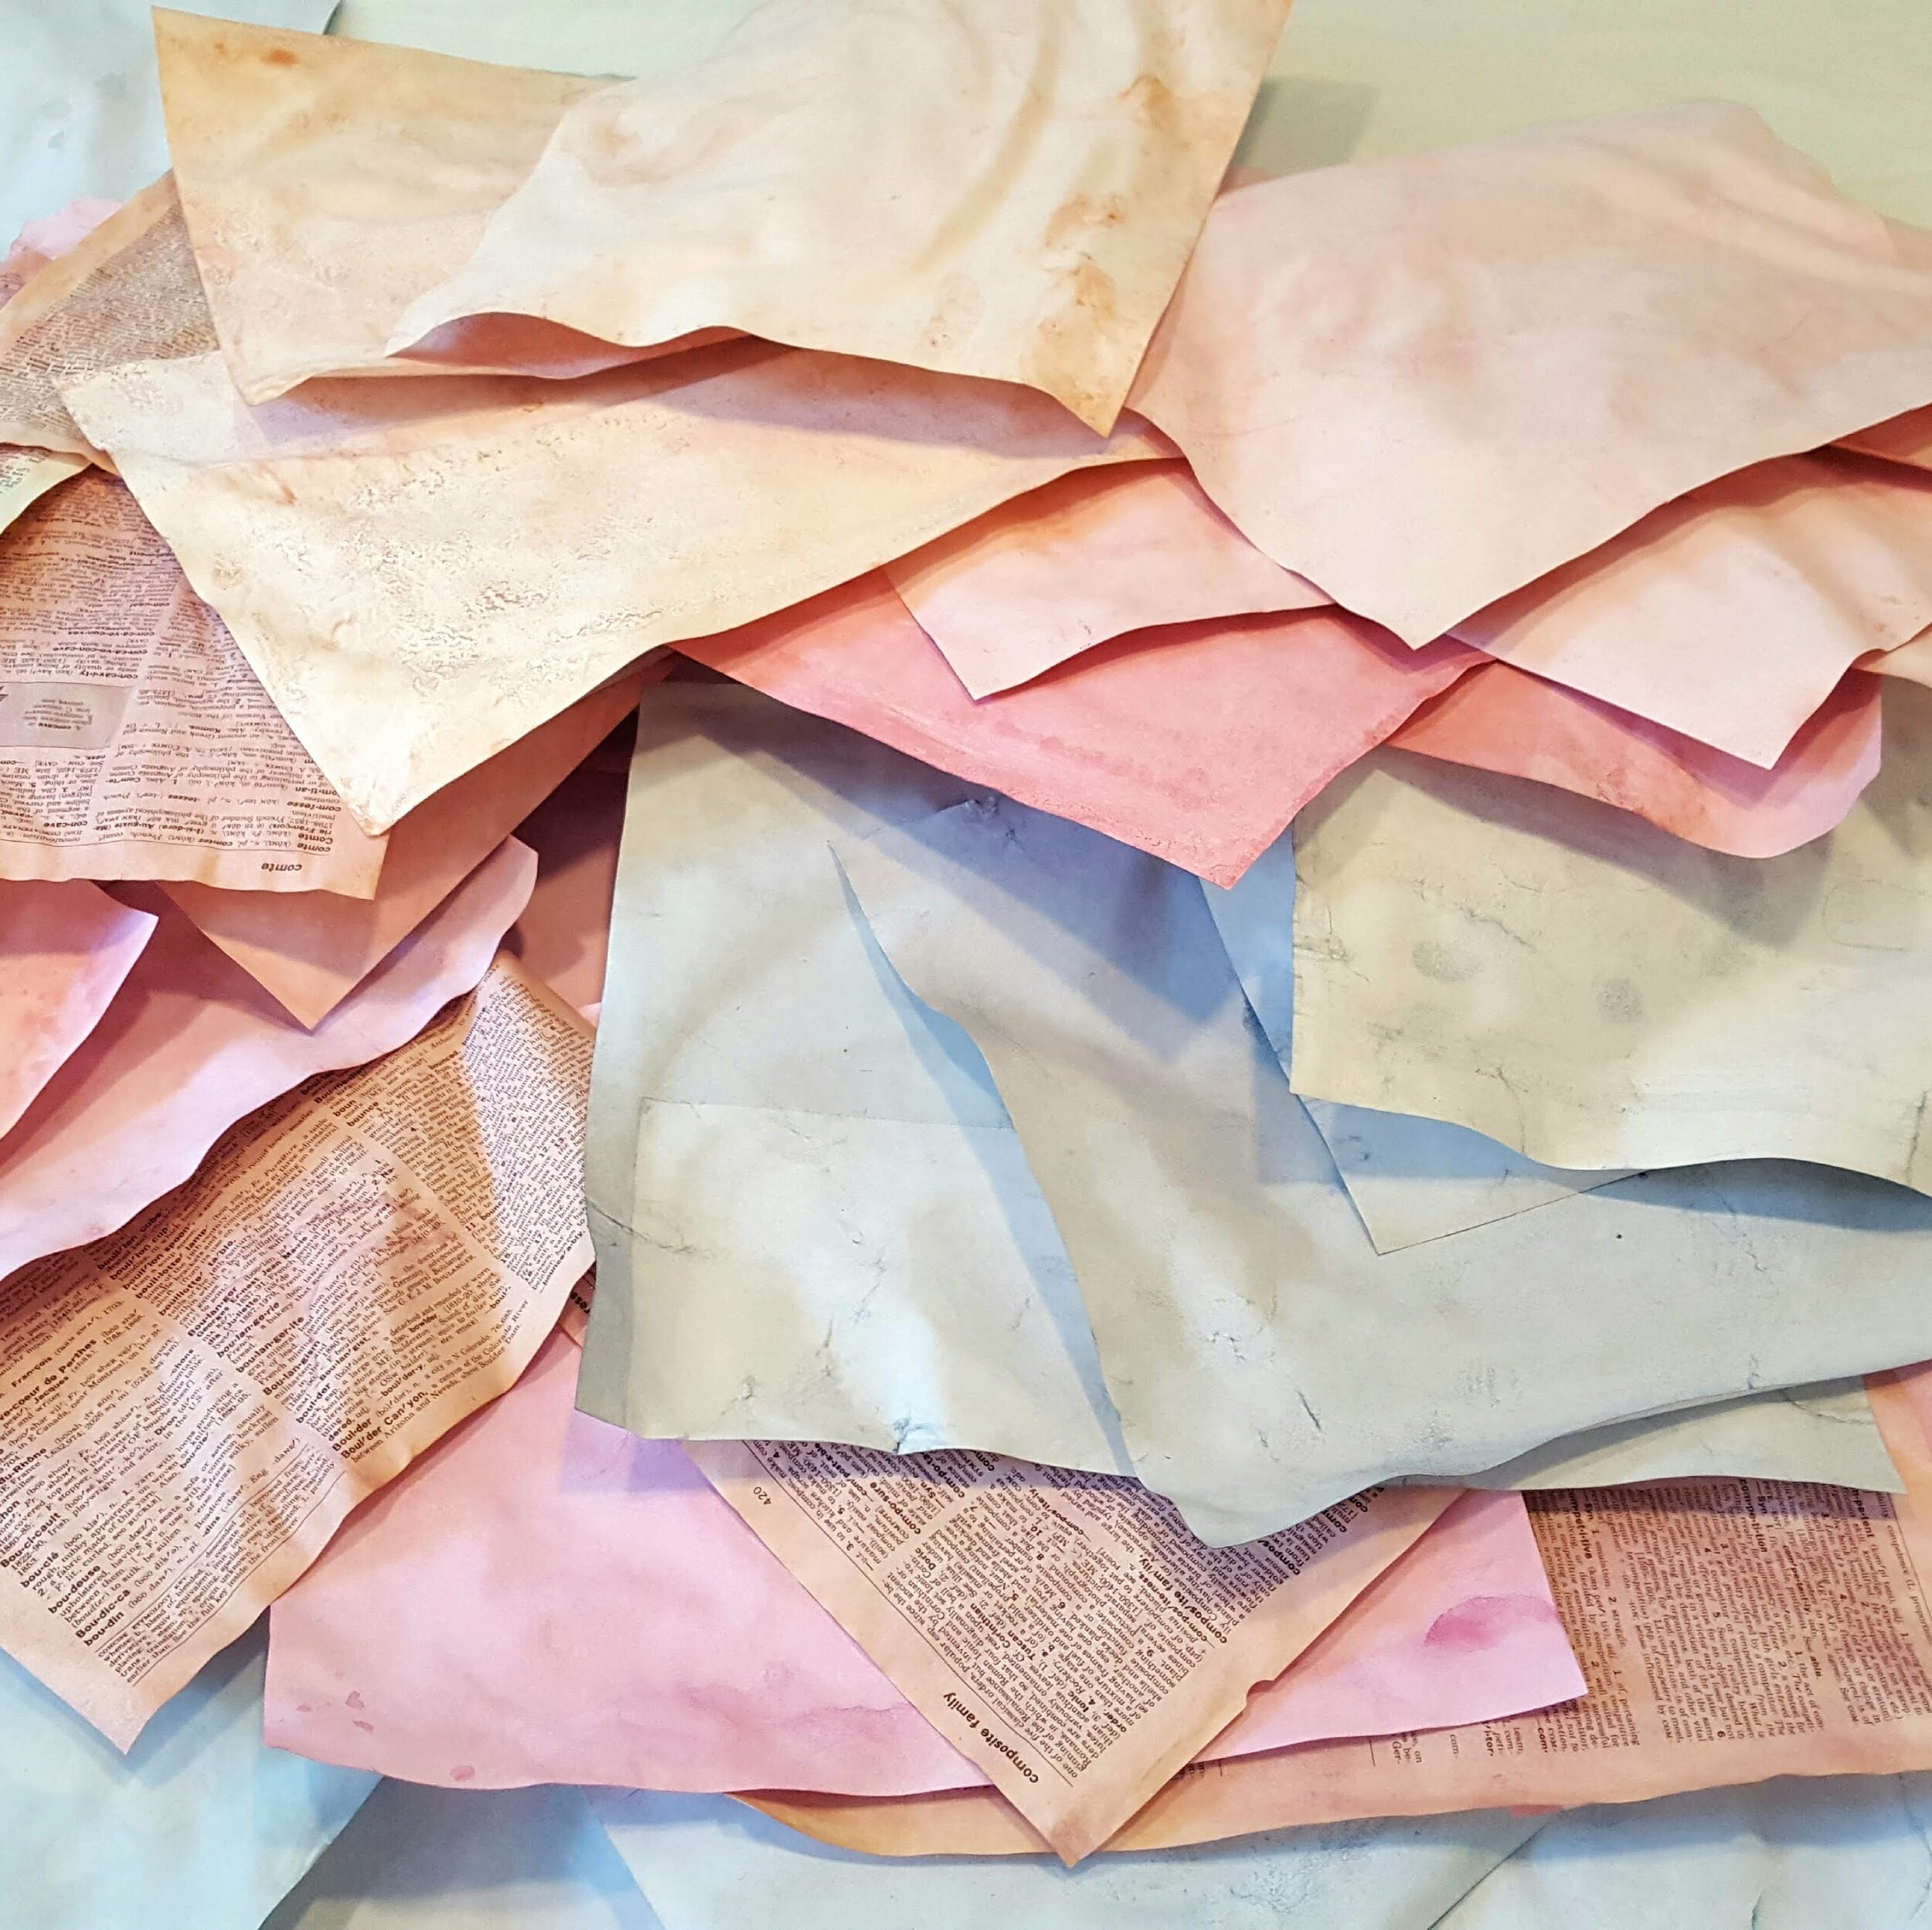
After a little trial and ink stained fingers, I decided to give it a go. I’m pretty happy with the results! I knew you would love these colors and want to try it too. Now I don’t have the exact amounts of each color that I mixed because I just kept adding a drop of one and then another to get what I liked. If your color is too bright, try adding a drop or two of it’s opposite from the color wheel to mute it down a bit and more or less water. For example, if the pink was too bright, I muted it down with a little green. If the blue was too bright I added a little orange. To get those faded colors, you have to make a little mud on purpose. Here’s what I used:
Plain printer paper
Mixed media paper
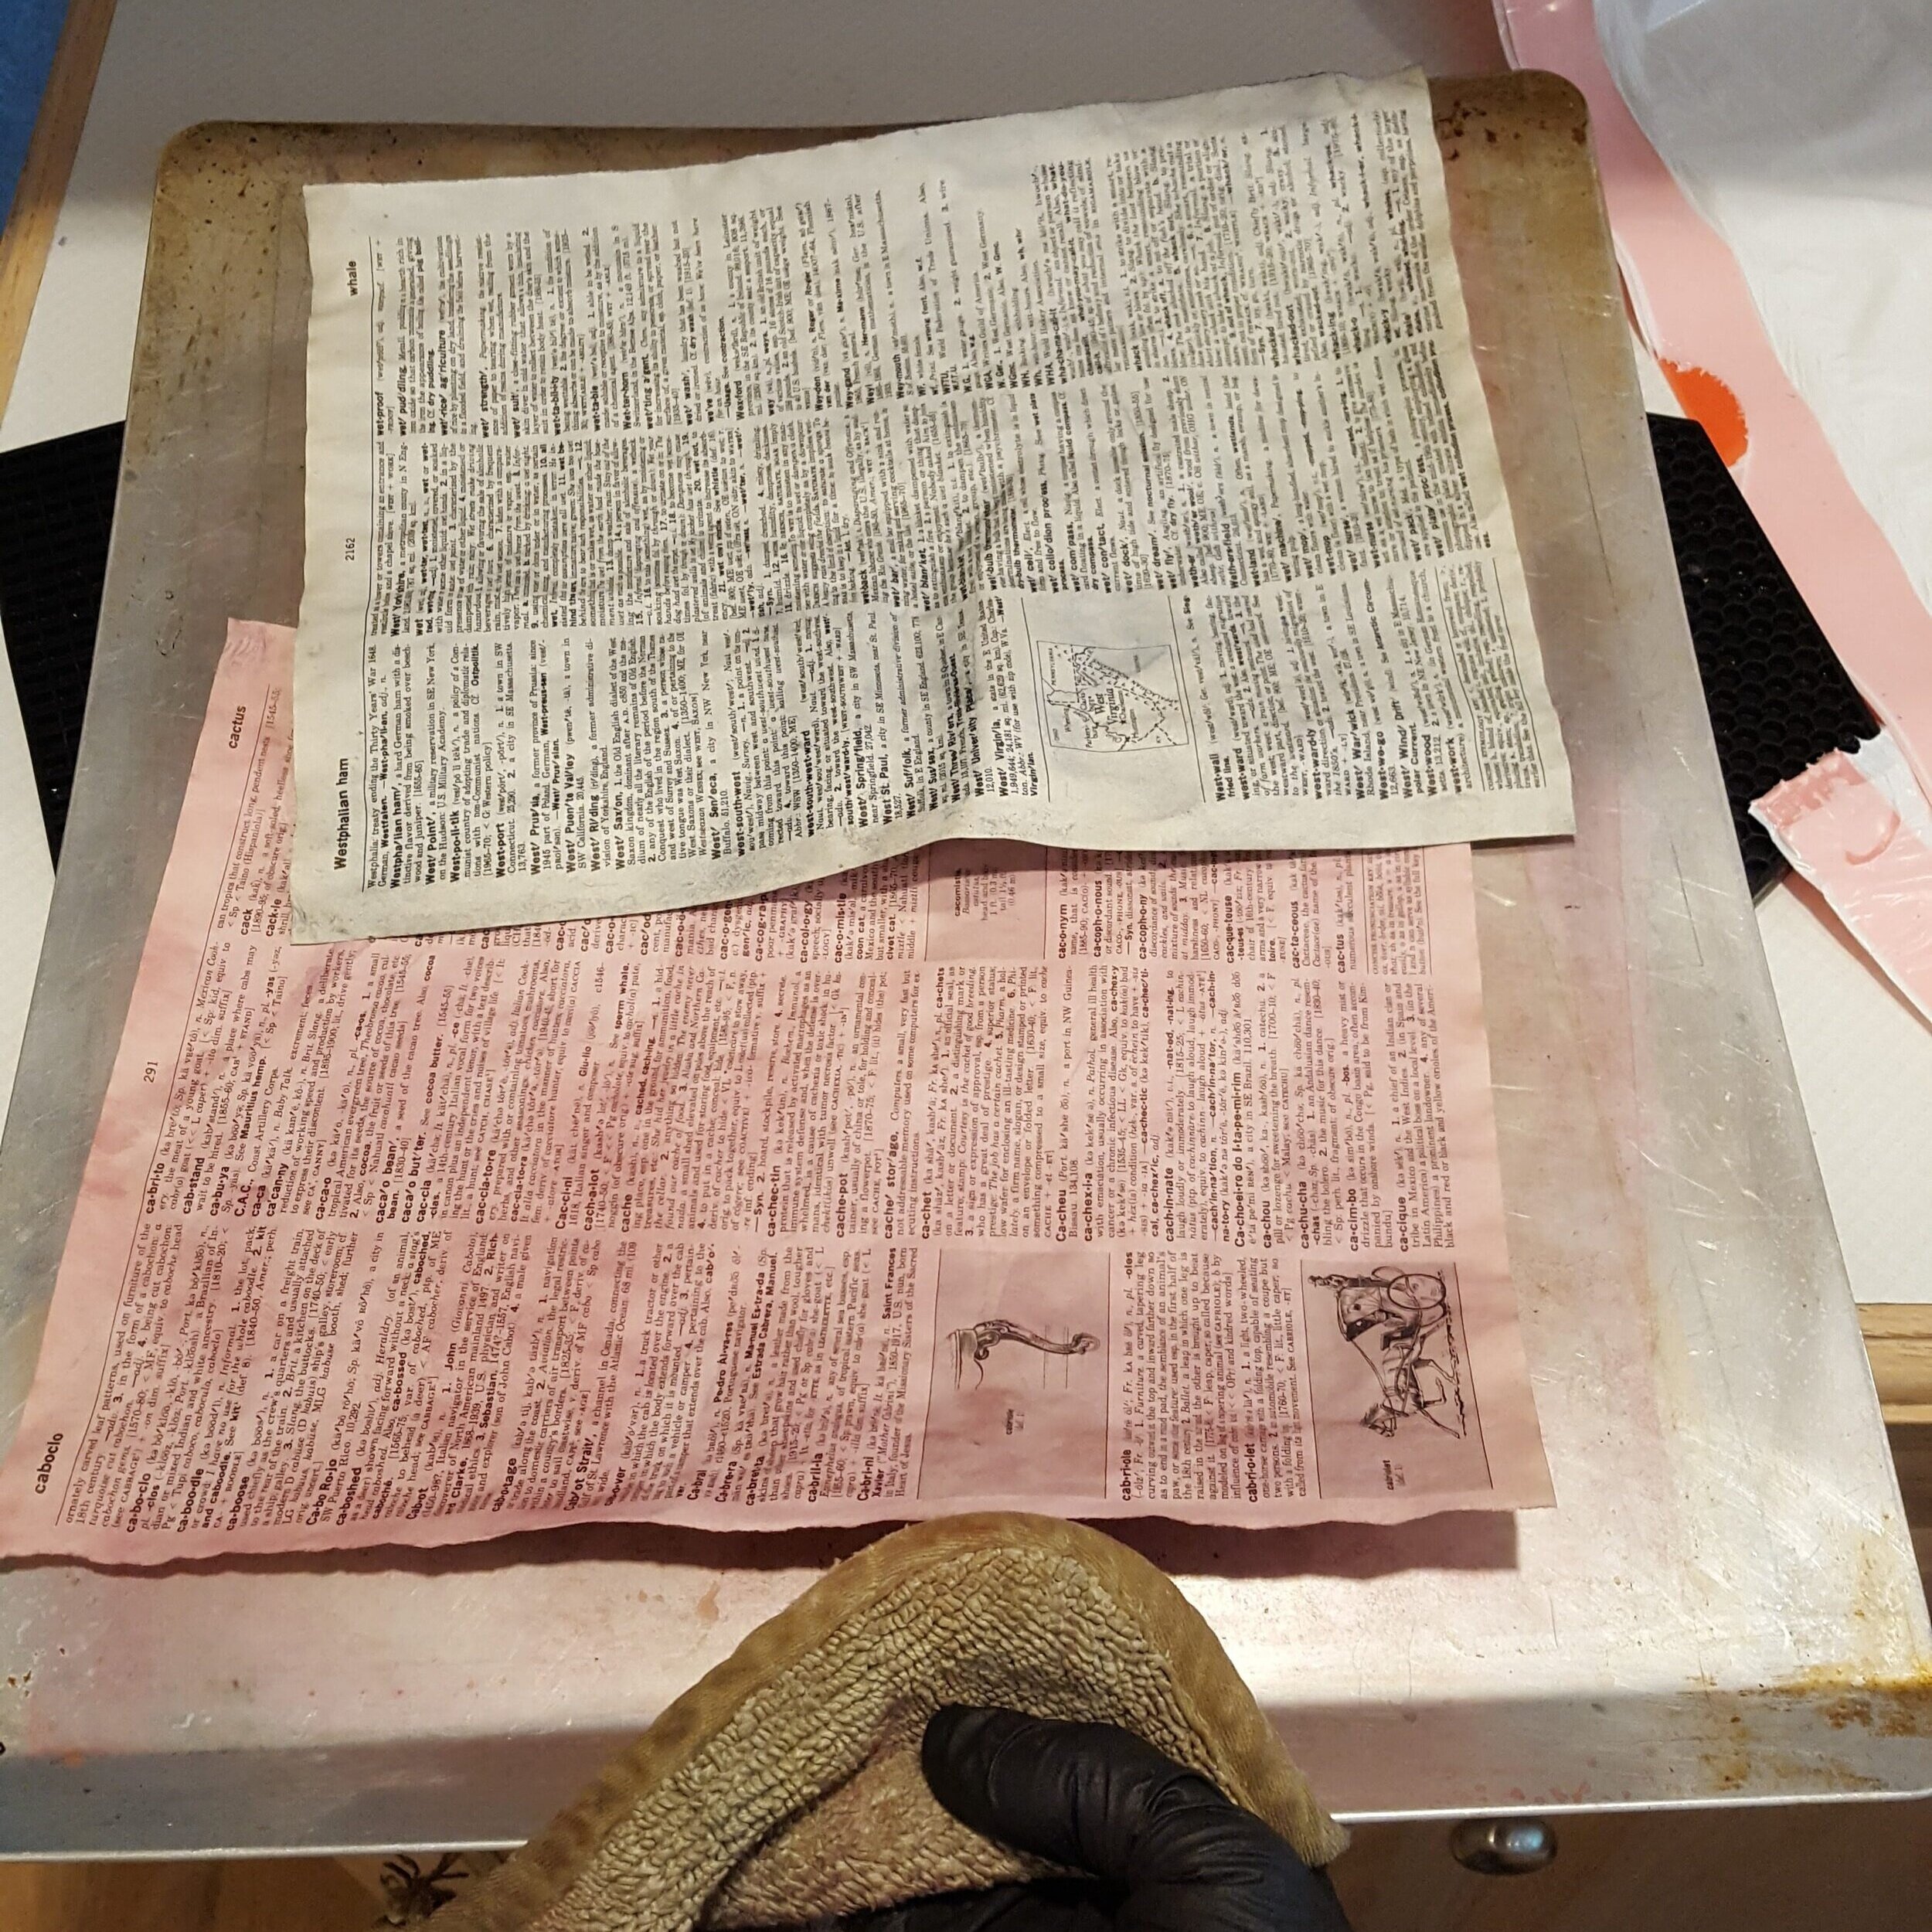
Old dictionary pages
Tru-Ray construction paper
Liquitex Acrylic Ink -Yellow Oxide, Phthalo Blue, Sap Green, Naphthol Crimson, Quinacridone Magenta
Daler Rowney FW Acrylic Ink - Indigo, Payne’s Grey, Olive Green
Dr. Ph. Martin’s Bombay India Ink - Violet
Water
Large cookie sheets
Old 9x13 inch baking dish
Gloves, apron, coverings for counter top
Containers to hold premixed dyes (I use Talenti Gelato containers!)
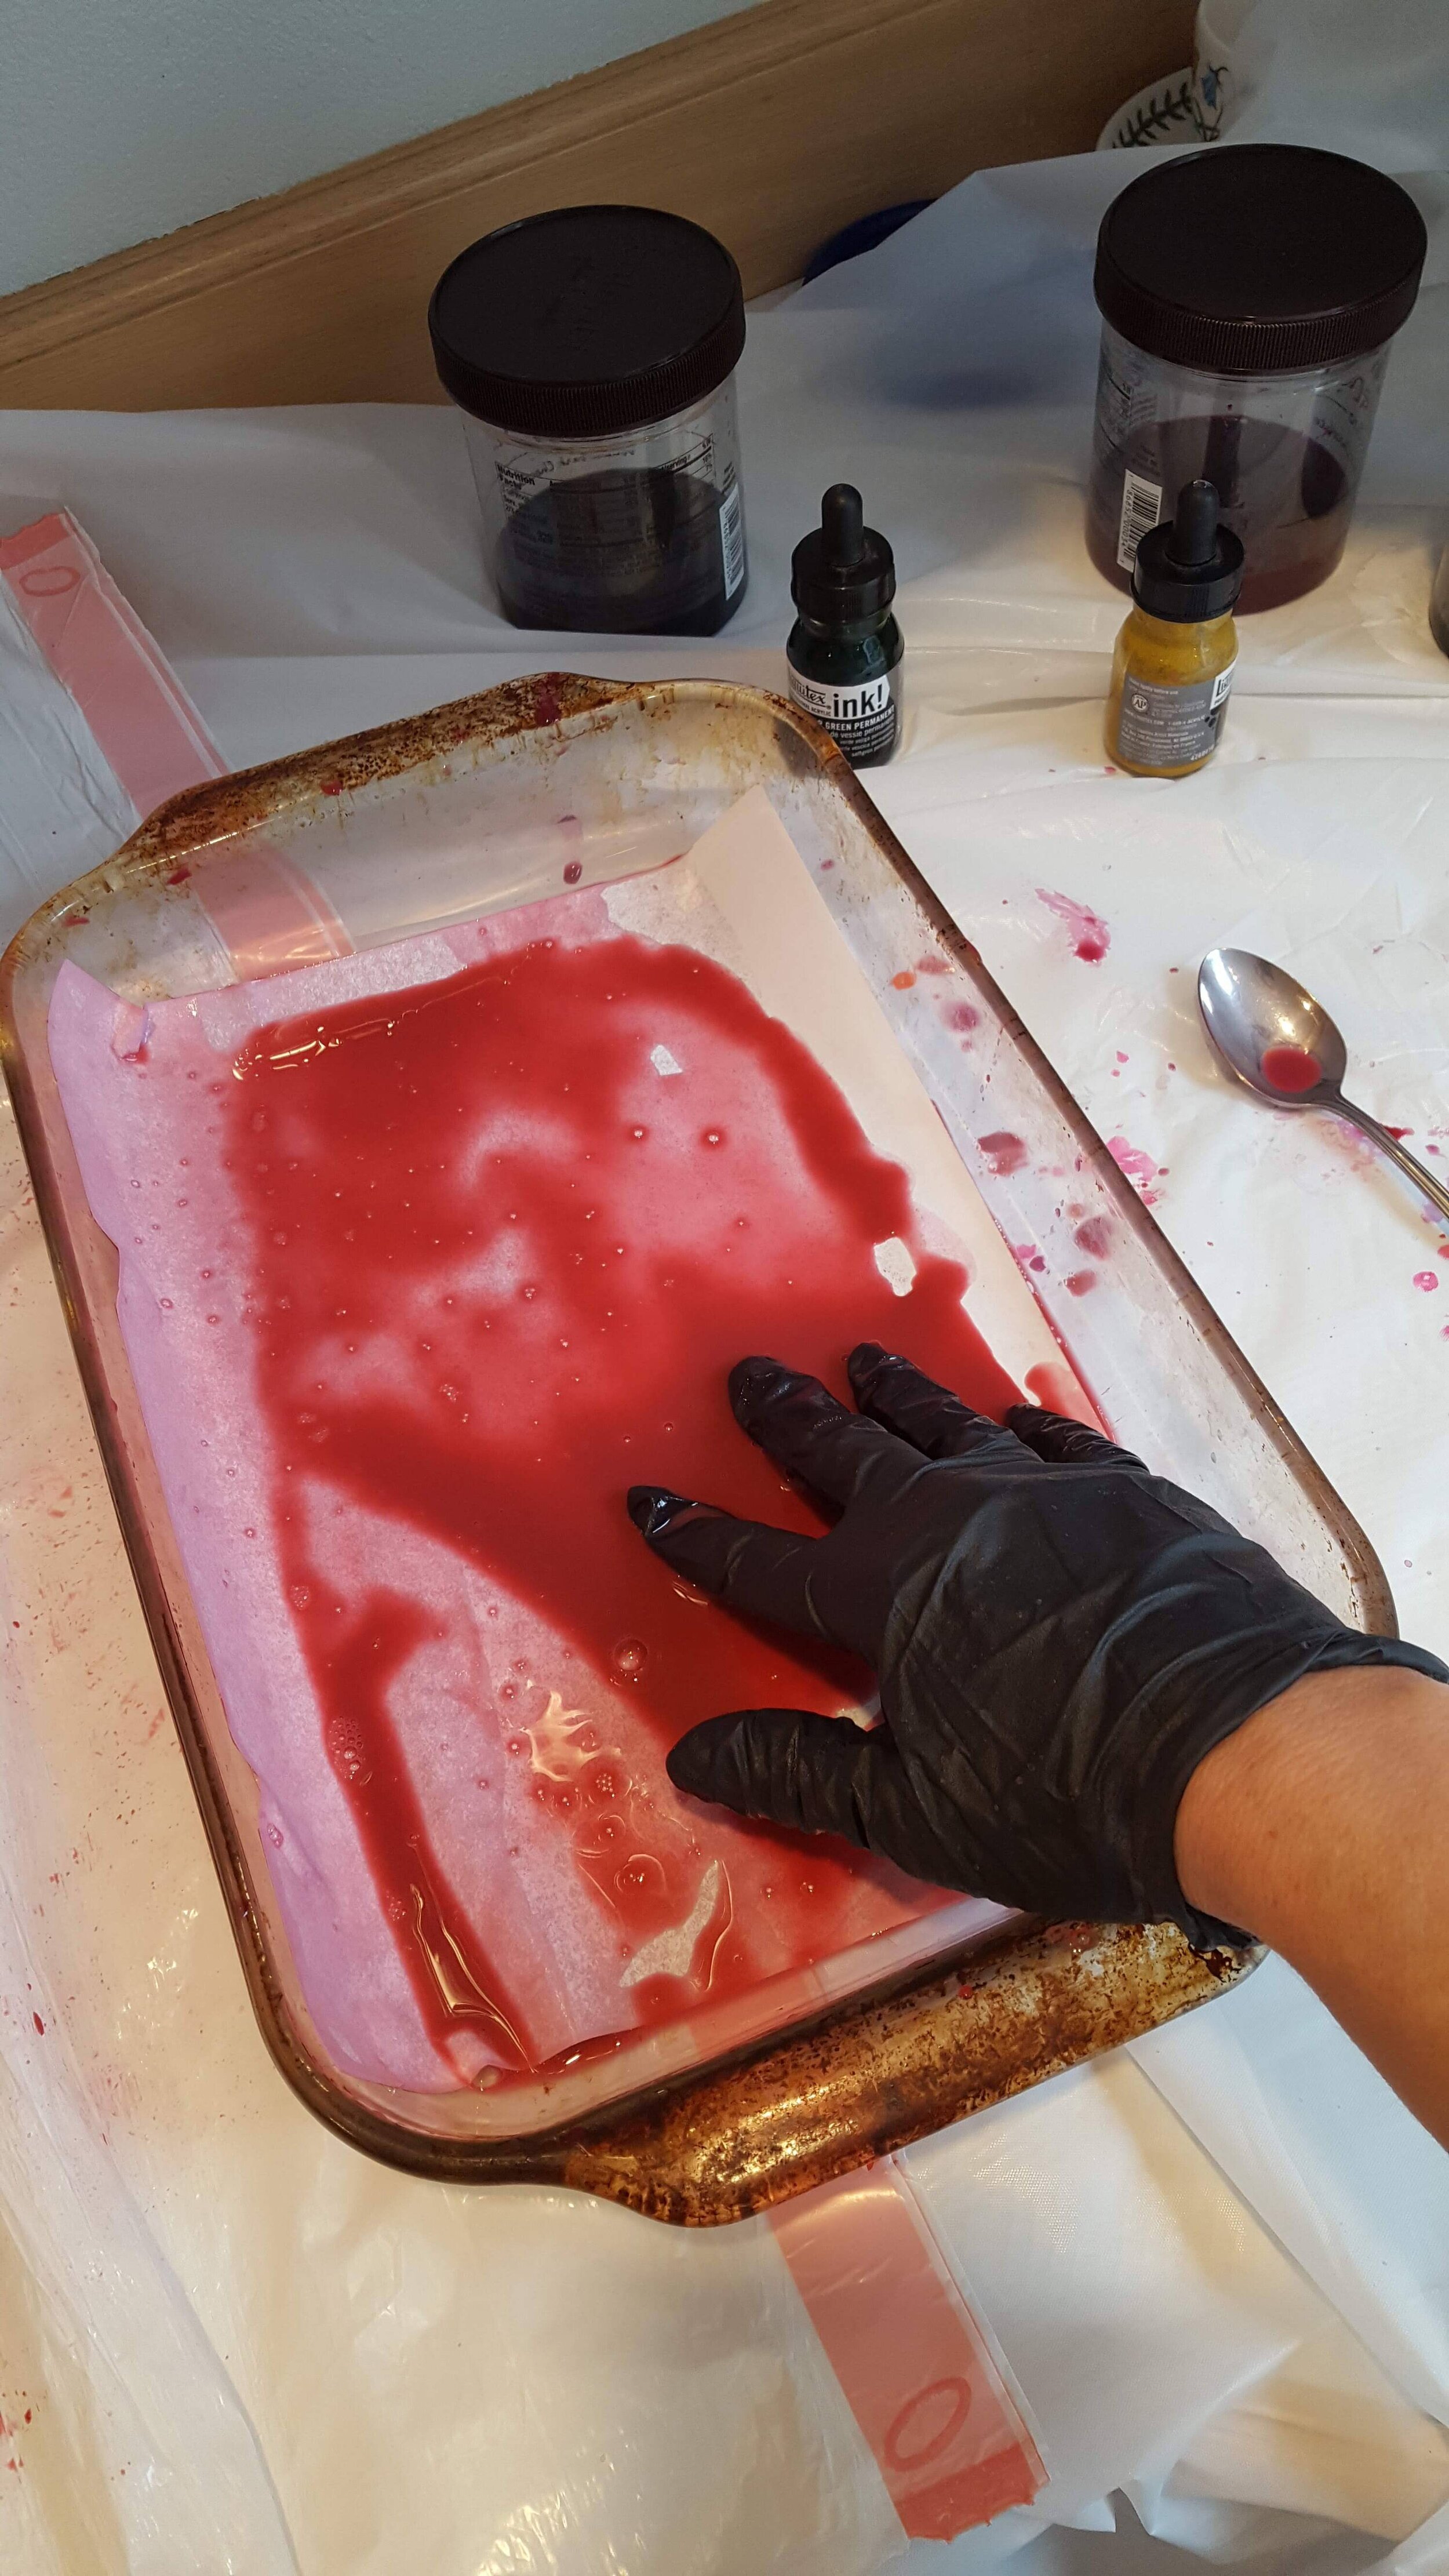
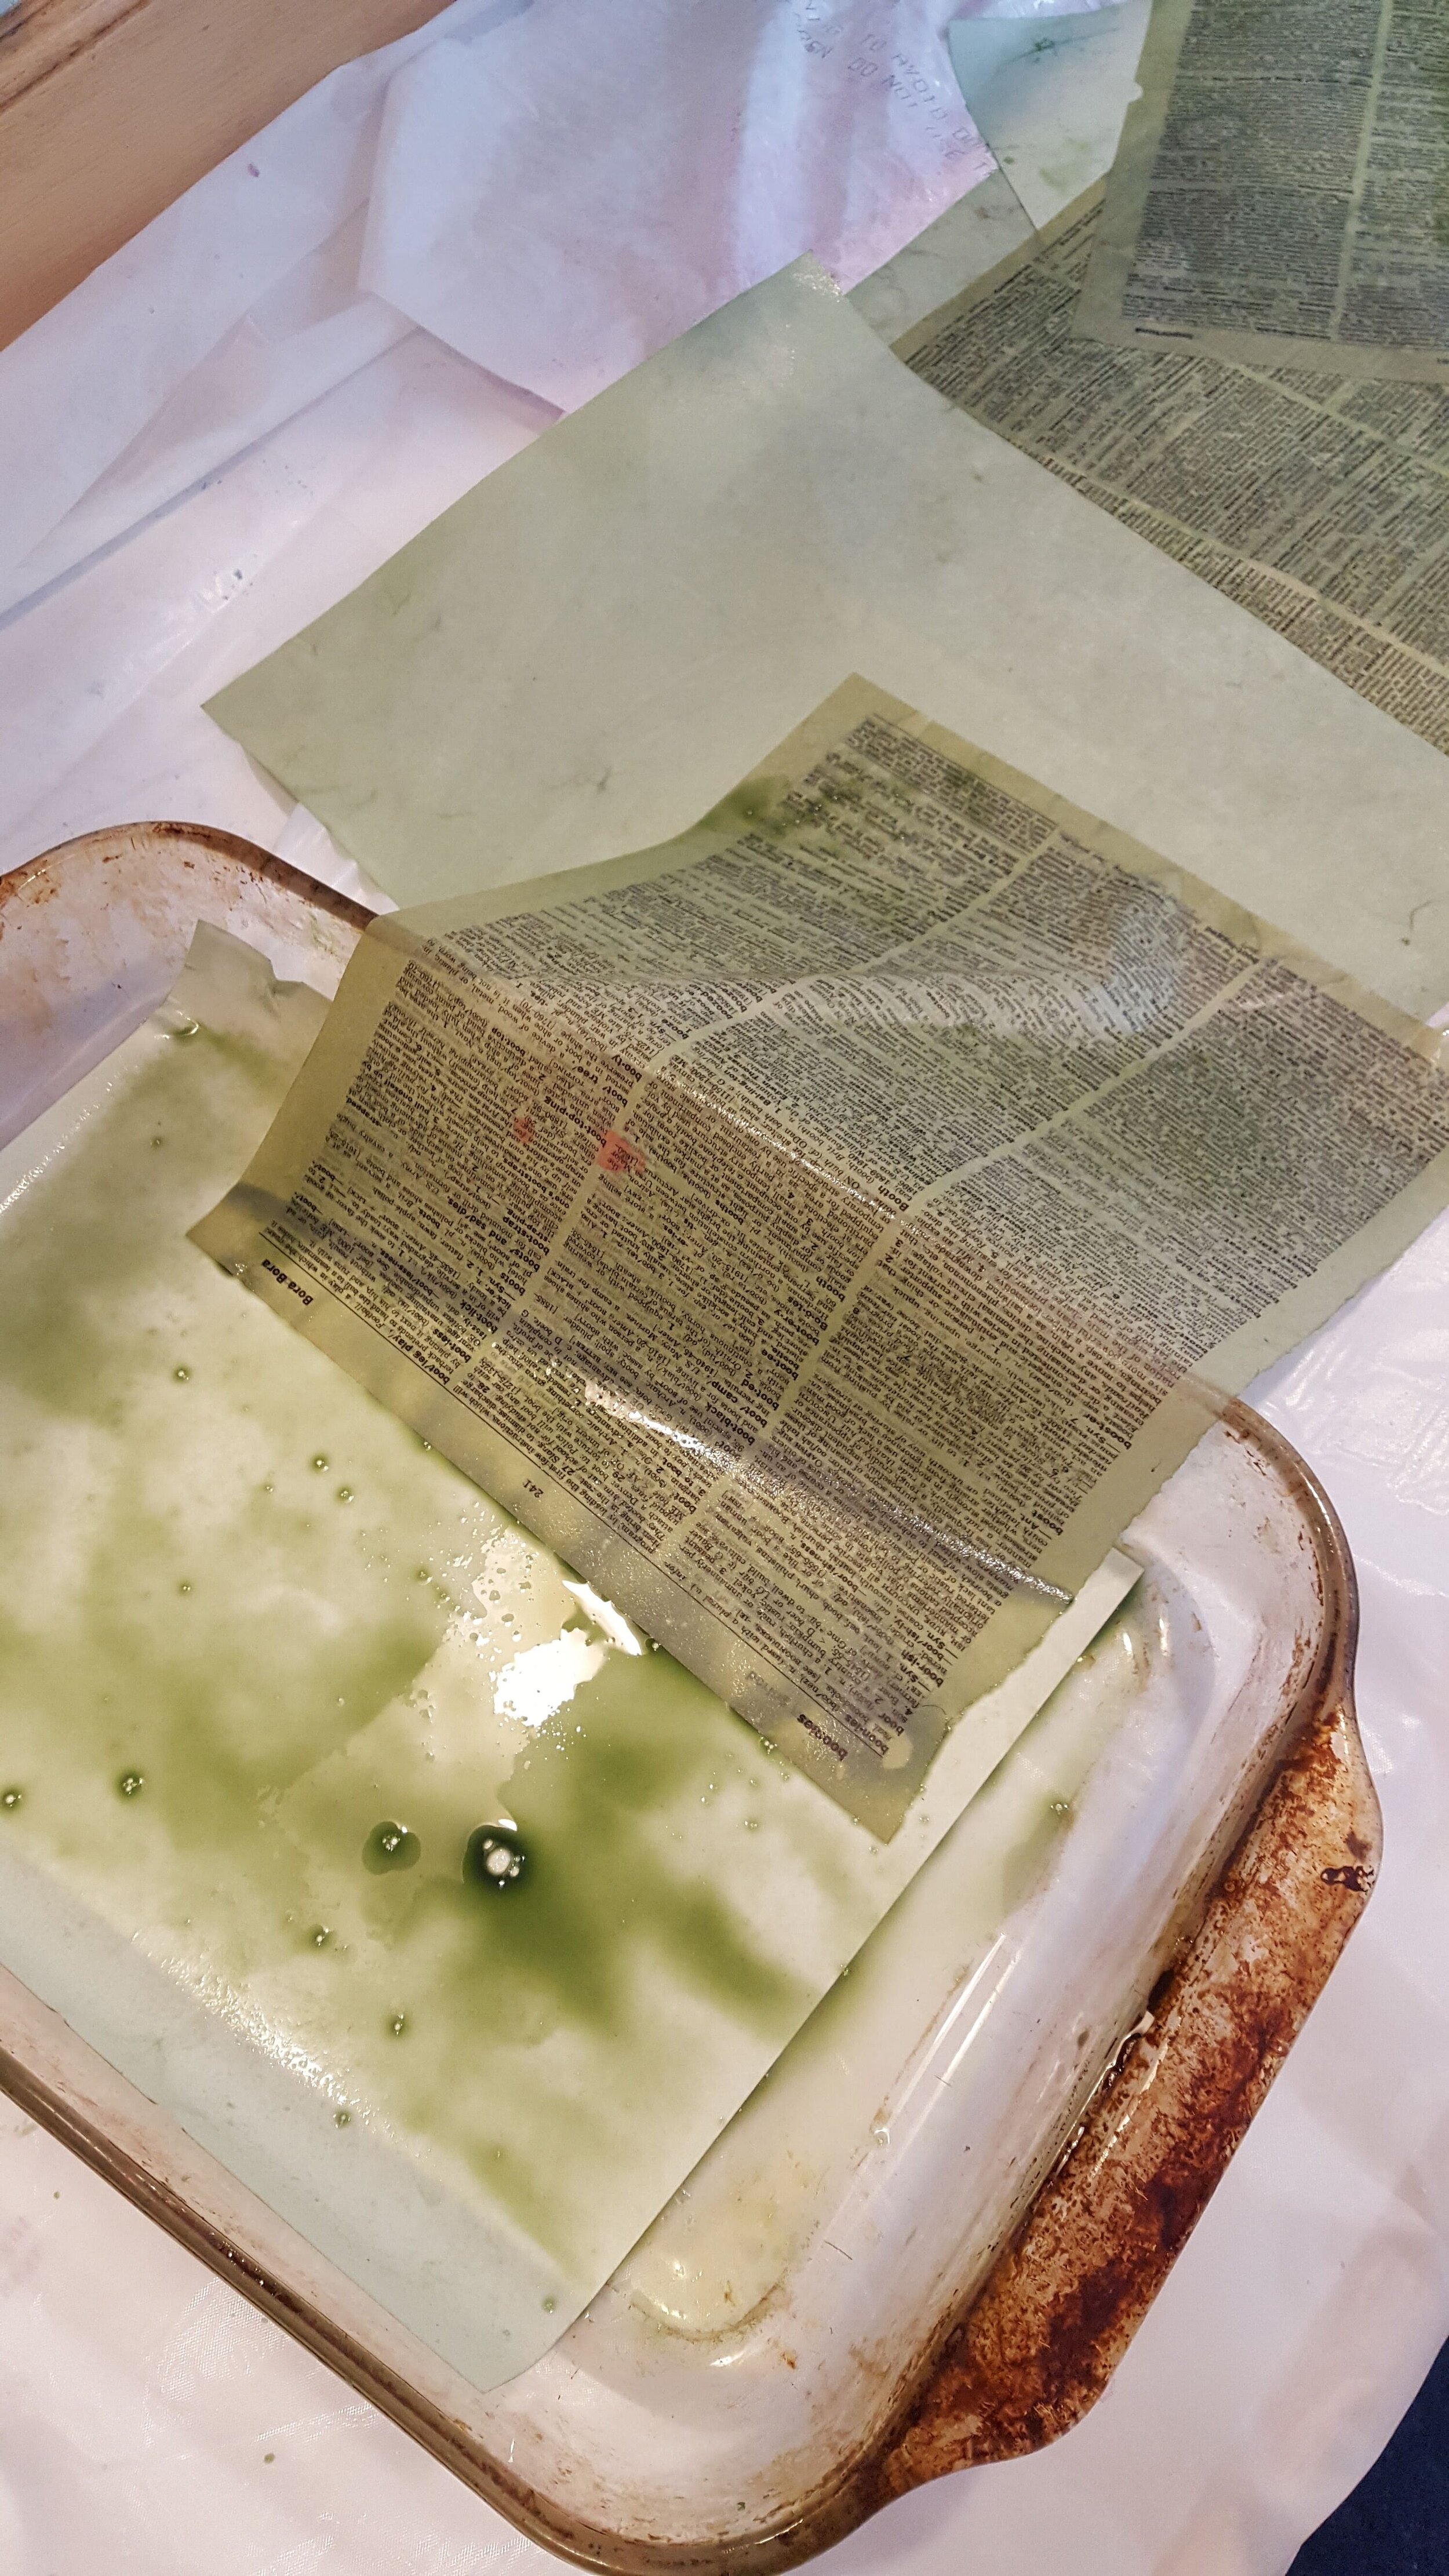
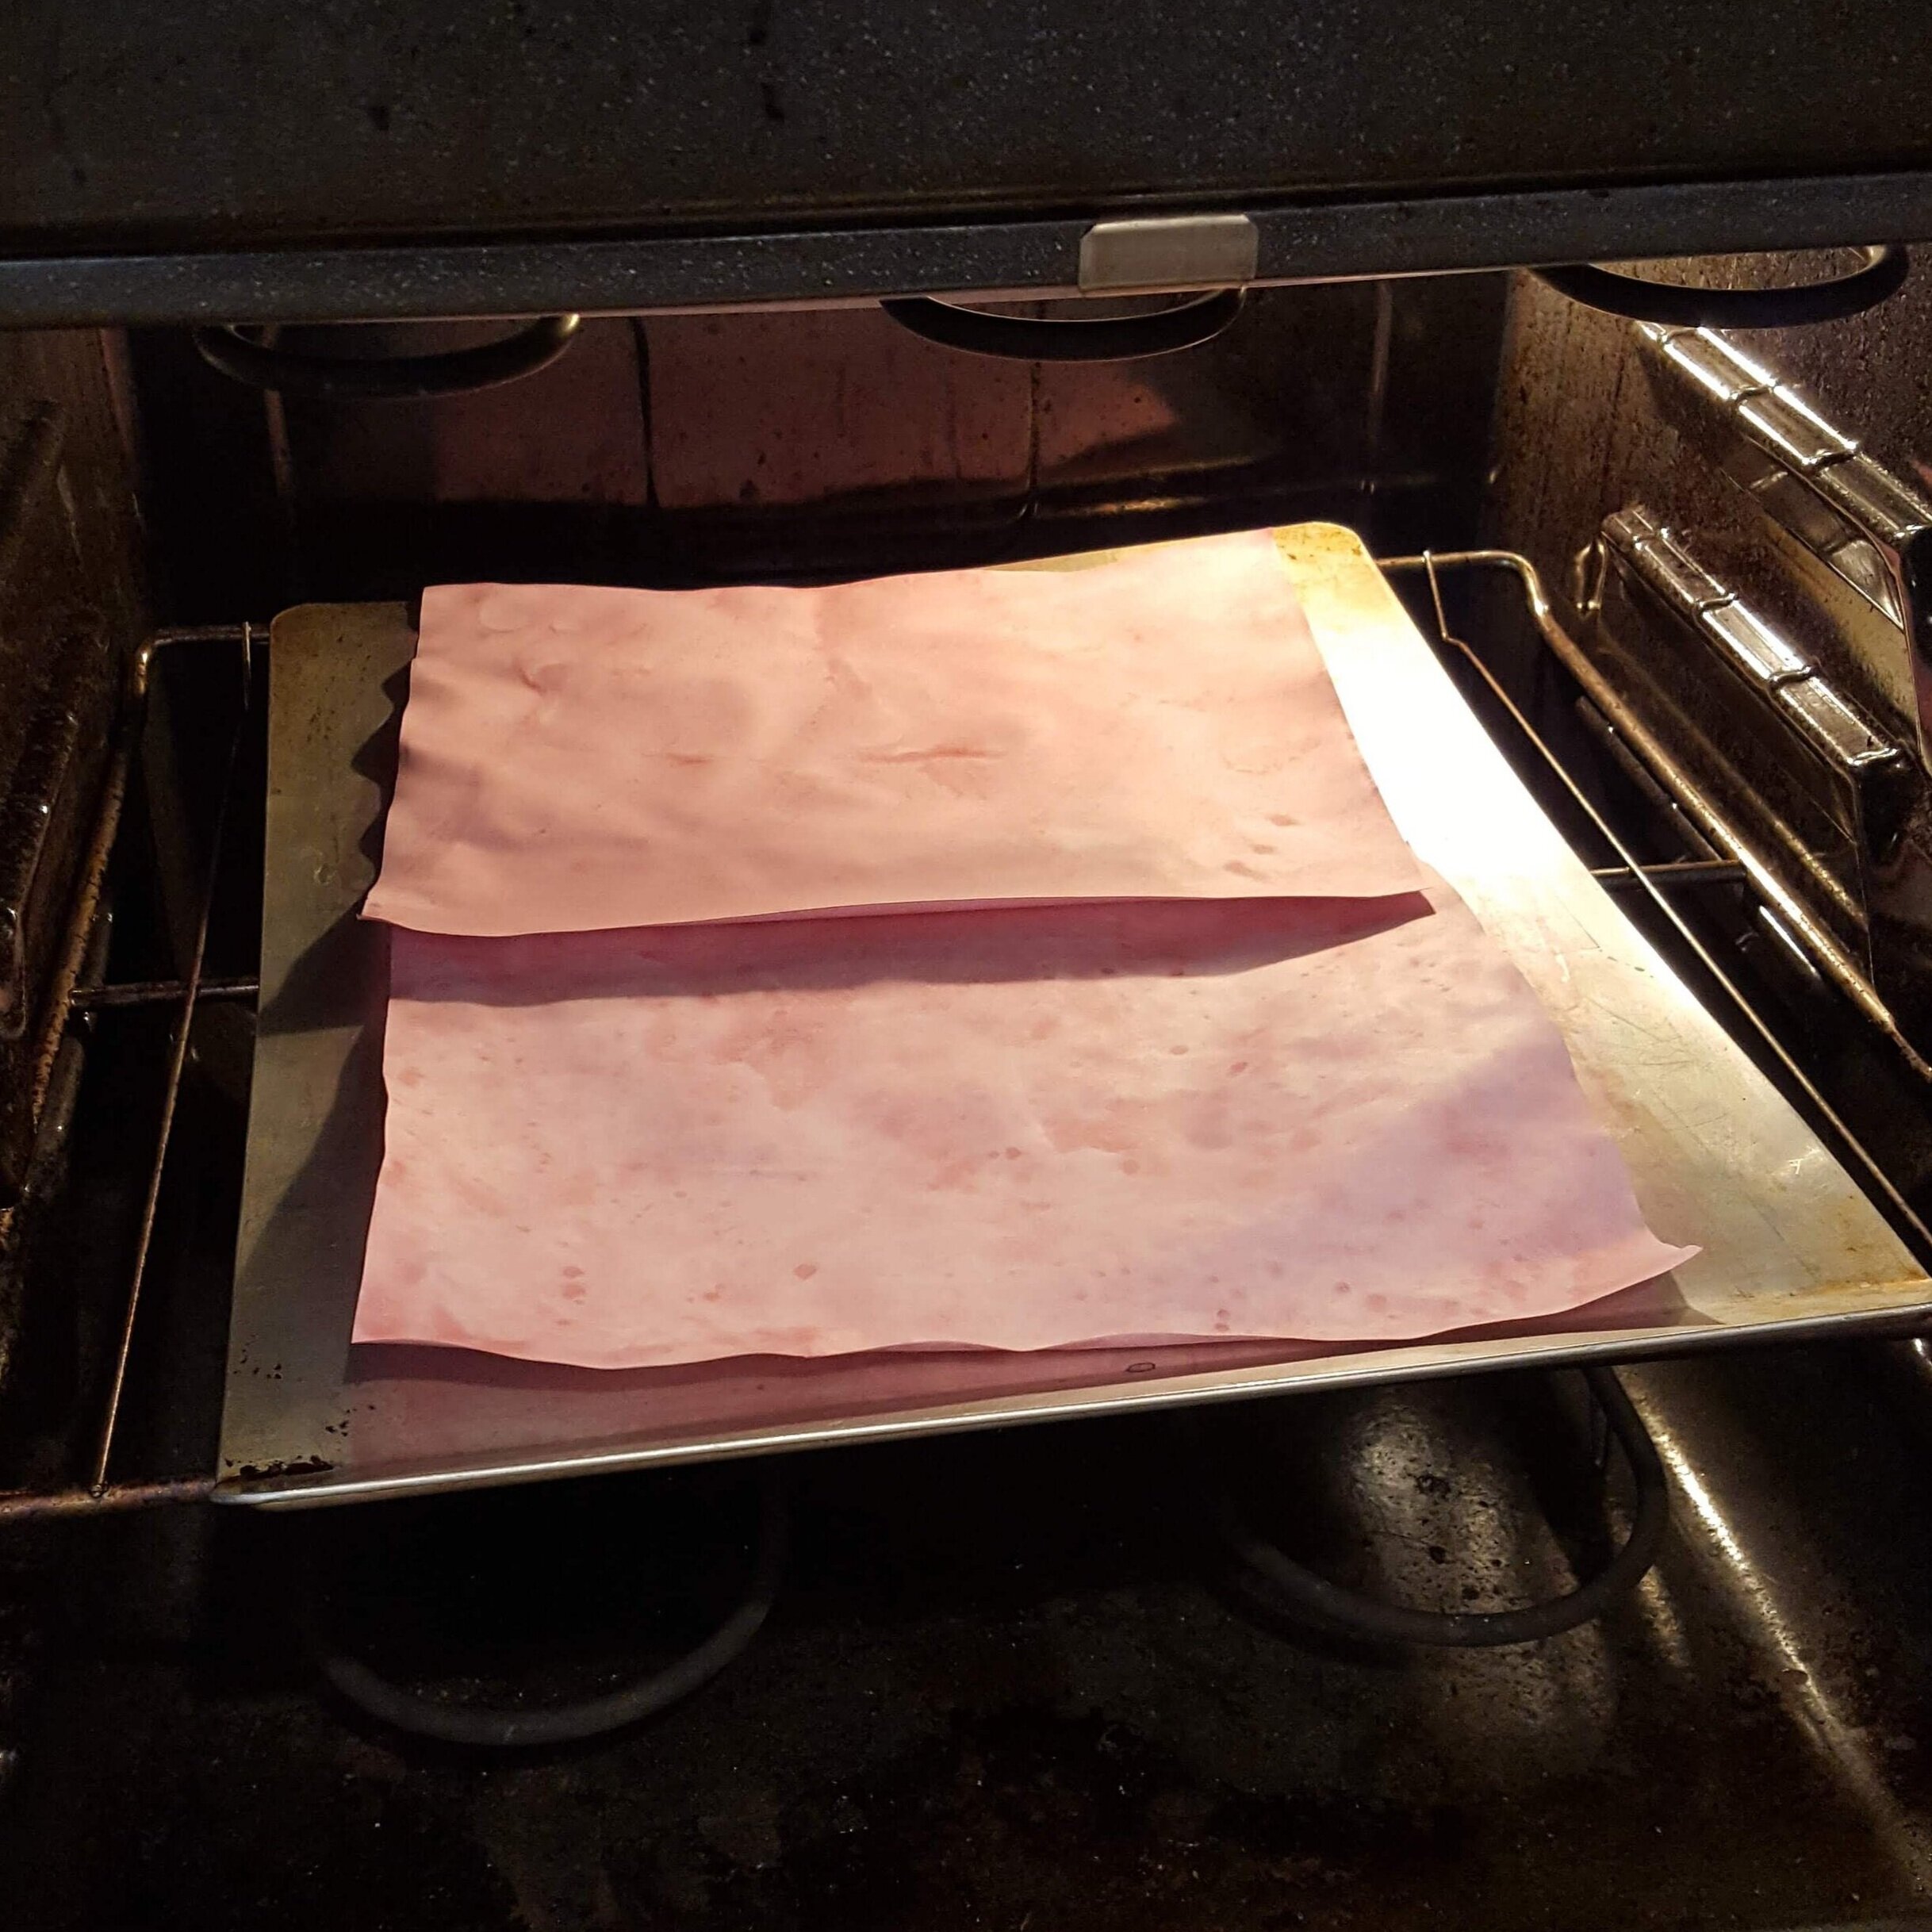

Heat your oven to 300 degrees. Cover your table or counter tops to prevent stains and wear gloves to keep your nails pretty. Pour a little dye into a 9x13 inch baking dish or deep tray. This is acrylic ink so you may want to use something you don’t intend to cook with later. You’ll want to make more of these anyway! Add some water to thin it down. Too much water will keep the ink from staining the paper enough. Just test it until you’re happy.
Soak each sheet of paper in the dye bath for a few seconds until the paper absorbs the color. Some paper will require a little more time in the bath. Lay the paper in single layers on the cookie sheets and dry them in the warm oven for about 5 minutes. You’ll know it’s dry when it starts to curl and raise off the sheet. You may want to iron the papers before binding them into journals or using them in collage pieces. Or you may just want to stack them up and look at them for a while because they’re so pretty!
I can’t wait to see the colors you create!
XO, Colleen
